Automated Test Kitchen Checks on GitHub Pull Requests using Docker, TeamCity, and AWS Spot Instances
Scenario
Being a model Chef user you’re using Test Kitchen to do integration testing of your Cookbooks. It works great on your machine using Vagrant! So let’s make sure these tests always run before code gets merged into Master in the GitHub repo.
Why Docker?
We’ll be using the chef/chefdk Docker container to run our Kitchen commands because what is the bane of a build agent’s life? Build dependencies! And what’s Docker good at? Containerising dependencies!
Seriously, if you’re not running your builds in containers on your build agents and are faffing around installing pyenv, rvm, gems, and node modules all over the place, well… you need to fix that.
Preparing your .kitchen.yml
Consider the following example:
---
driver:
  name: ec2
  region: eu-west-2
  spot_price: 0.5
  instance_type: t2.small
  security_group_ids:
    - sg-xxxx
  subnet_id: subnet-xxxx
  retryable_tries: 120 # Wait 10 minutes for it to become ready (it's * 5 secs)
  tags:
    Name: Test Kitchen - my_cookbook_name
provisioner:
  product_name: chef
  product_version: 14

verifier:
  name: inspec

platforms:
  - name: debian-8
  - name: debian-9
  - name: ubuntu-16.04
  - name: windows-2008r2sp1
    driver:
      instance_type: t2.large
      spot_price: false
  - name: windows-2012r2
    driver:
      instance_type: t2.large
      spot_price: false

suites:
  - name: 'default'
  run_list:
    - recipe[my_cookbook_name]
Most of this is fairly self explanatory if you’ve some experience with Kitchen, but these are worth calling out:
security_group_ids- Creating your own SG prevents thekitchen-ec2driver from having to create its own, and then wait for the instance to terminate before deleting it (which can add minutes when you’re working with Windows instances).spot_price- This tellskitchen-ec2to use spot instances up to the bid price of $0.50.retryable_tries- Not a documented parameter for thekitchen-ec2driver, but I found that increasing the timeout for waiting for Windows instances to spin up to 10 mins (from the default of 5) was necessary with smaller instance sizes.instance_type: t2.large- For Windows Instances I added this to make them larger to try and resolve connection issues (see Troubleshooting).spot_price: false- For Windows Instances I added this to force them to be OnDemand rather than Spot to try and resolve connection issues (see Troubleshooting).
Obviously you should change subnet_id, region, and security_group_ids to reflect your environment.
Trying it locally
You will need:
- Docker
- To set the
AWS_ACCESS_KEY_IDandAWS_SECRET_ACCESS_KEYvariables with a user that has lots of permissions (mostly ec2… I think all ec2? It’s your sandbox account, it’ll be fine.)
Now run the following command inside your cookbook directory.
docker run \
  --user $(id -u $USER) \
  -v $(pwd):/sut \
  -e HOME=/sut \
  -e AWS_ACCESS_KEY_ID \
  -e AWS_SECRET_ACCESS_KEY \
  chef/chefdk  \
  bash -c 'cd /sut ; \
  chef exec kitchen test "ubuntu|debian|centos" -c 2 ;'
Let’s break down these args one by one:
--user $(id -u $USER)run the commands in the container with the same UID as the one executing Docker on the host machine. This means that we can manipulate the files kitchen creates after we kill the container, without using the root account.-v $(pwd):/sutmap the current directory on the host to/sut/(System Under Test) in the container-e HOME=/sutthe user we’re executing commands as in the container doesn’t actually exist, so when Berkshelf, Inspec, etc. try to create files in the user’s home directory, it will default to/in the container and fail due to a lack of permissions, so set it to be/sut!AWS_ACCESS_KEY_IDandAWS_ACCESS_KEY_IDare just passing those variables in from our host machine directly.chef exec kitchen test "ubuntu|debian|centos"test only Ubuntu, Debian, and CentOS platforms-c 2limit the number of concurrent tests to 2, more on this later.
What should happen is that test kitchen spins up the instances two at a time, tests them, and then destroys them, returning exit code 0.
Creating the TeamCity Build Configuration
Create a new build configuration, then add a VCS root pointing to the GitHub repo containing your cookbook (which should be the only thing in the repo naturally!).
VCS
Add the following branch specification so that Pull Requests are included in the buildable commits: +:refs/pull/(*/merge).
Build Steps

Kitchen Test (Linux)
Create a build step named Kitchen Test (Linux) with the following command line content:
docker run \
  --user $(id -u $USER) \
  -v $(pwd):/sut \
  -e HOME=/sut \
  -e AWS_ACCESS_KEY_ID \
  -e AWS_SECRET_ACCESS_KEY \
  chef/chefdk  \
  bash -c 'cd /sut ; \
  chef exec kitchen test "ubuntu|debian|centos" -c 2 ;'
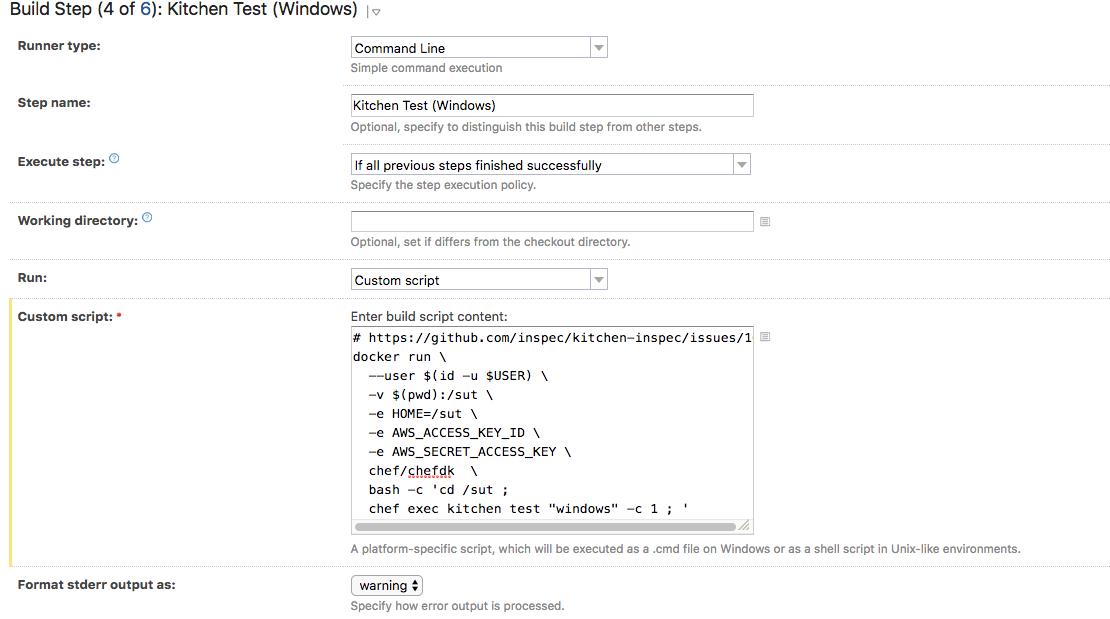
Kitchen Test (Windows)
Create a build step named Kitchen Test (Windows) with the following command line content:
docker run \
  --user $(id -u $USER) \
  -v $(pwd):/sut \
  -e HOME=/sut \
  -e AWS_ACCESS_KEY_ID \
  -e AWS_SECRET_ACCESS_KEY \
  chef/chefdk  \
  bash -c 'cd /sut ;
  chef exec kitchen test "windows" -c 1 ; '
 (You’re probably asking yourself why we’re testing Windows and Linux separately. We’ll cover this in a minute.)
Kitchen Destroy
Final build step we’ll create is Kitchen Destroy with the following commandline content:
docker run \
  --user $(id -u $USER) \
  -v $(pwd):/sut \
  -e HOME=/sut \
  -e AWS_ACCESS_KEY_ID \
  -e AWS_SECRET_ACCESS_KEY \
  chef/chefdk  \
  bash -c 'cd /sut ; chef exec kitchen destroy ;'
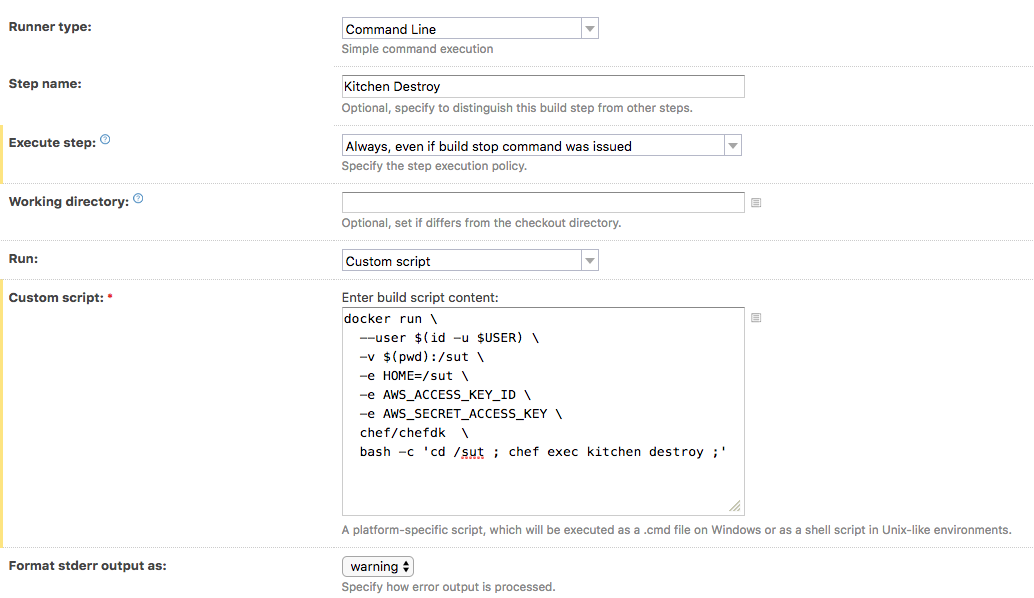
IMPORTANT: In this test change the Execute Step: setting to be Always, even if build stop command was issued.
This step will always run, even if the previous steps failed, even if the job was stopped, because we always want to clean up our spot instances (otherwise we end up spending all the money!).
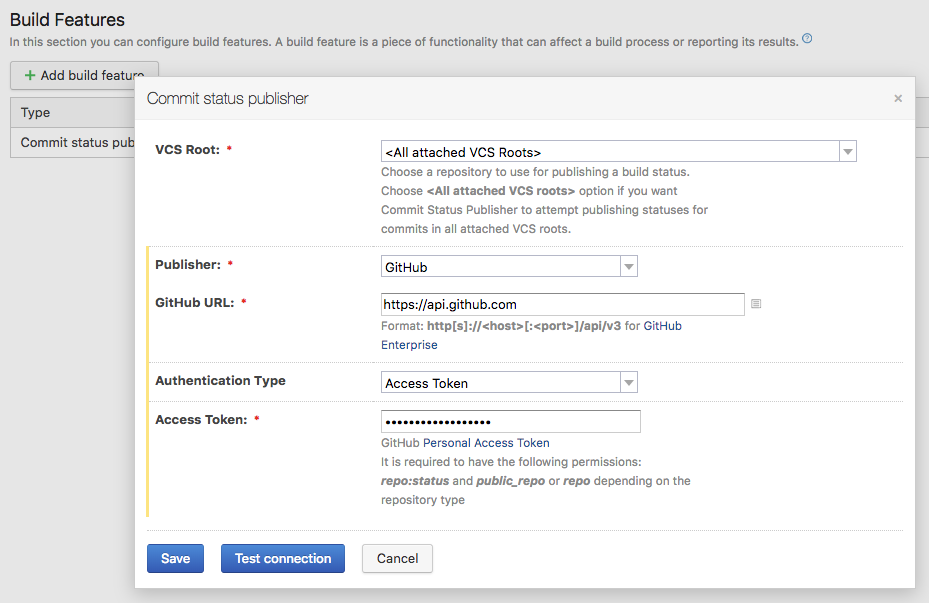
Build Features
Now add the Commit status publisher build feature, configure it to point to GitHub with an access token created against your GitHub user.
Environment Variables
Set the following environment variables:
- AWS_ACCESS_KEY_ID
- AWS_SECRET_ACCESS_KEY Again, whatever user you create these off will need permission to create EC2 instances at least, see kitchen-ec2 requirements for more.
Run Your Build!
Your TeamCity build should now run through each test just as you did locally. (Assuming you remembered to install Docker on your build agents. You did right?) Provided it all works, you’re done! If you’re encountering issues, see: Troubleshooting
Troubleshooting
I encountered the following errors while perfecting this setup:
Failed to complete #converge action: [Permission denied @ dir_s_mkdir - /.berkshelf]
This is because I had specified the --user arg when doing docker run to a user that didn’t exist, and therefore defaulting the home directory (used by Berkshelf) to / which it didn’t haven’t permission to write to. Setting the HOME environment variable to the working directory fixed this (see examples of docker run above).
Failed to complete #converge action: [[WSMAN ERROR CODE: 995]: <f:WSManFault Code='995' Machine='ec2-18-130-182-109.eu-west-2.compute.amazonaws.com' xmlns:f='http://schemas.microsoft.com/wbem/wsman/1/wsmanfault'><f:Message>The I/O operation has been aborted because of either a thread exit or an application request. </f:Message></f:WSManFault>] on default-windows-2008r2sp1
This one still seems to crop up occasionally. The WinRM connection to the AWS instances seems very fragile and small blips in network connectivity (or perhaps system availability?) seem to interrupt it. I haven’t really got to the bottom of this one, but setting the -c parameter of test kitchen to 1 (to only allow only one to run at a time) and launching the Windows instances as larger, OnDemand (rather than spot) instances, seems to reduce the frequency.
Failed to complete #verify action: [undefined method `each' for nil:NilClass] on
This one is due to a race condition bug that exists in kitchen-inspec - #167. This is why even the Linux steps above are limited to a max of two concurrent tests.