Creating HTTP Invoked PowerShell Azure Functions
Azure Functions (introduced on the 31st of March 2016) is Azure’s answer to AWS Lambda, but boasts a much wider range of supported languages, particularly PowerShell which piqued my interest.
It’s currently in Preview, and the documentation is a little light at the time of writing. In fact, it’s basically non-existent for PowerShell save for a single QueueTrigger – PowerShell example function for PS scripts triggered by a queue. So let’s work from this as our base script!
(See Create your first Azure Function for a guide on how to get to this point. Just make sure you select the *QueueTrigger – PowerShell *function instead of the NodeJS function he suggests.)
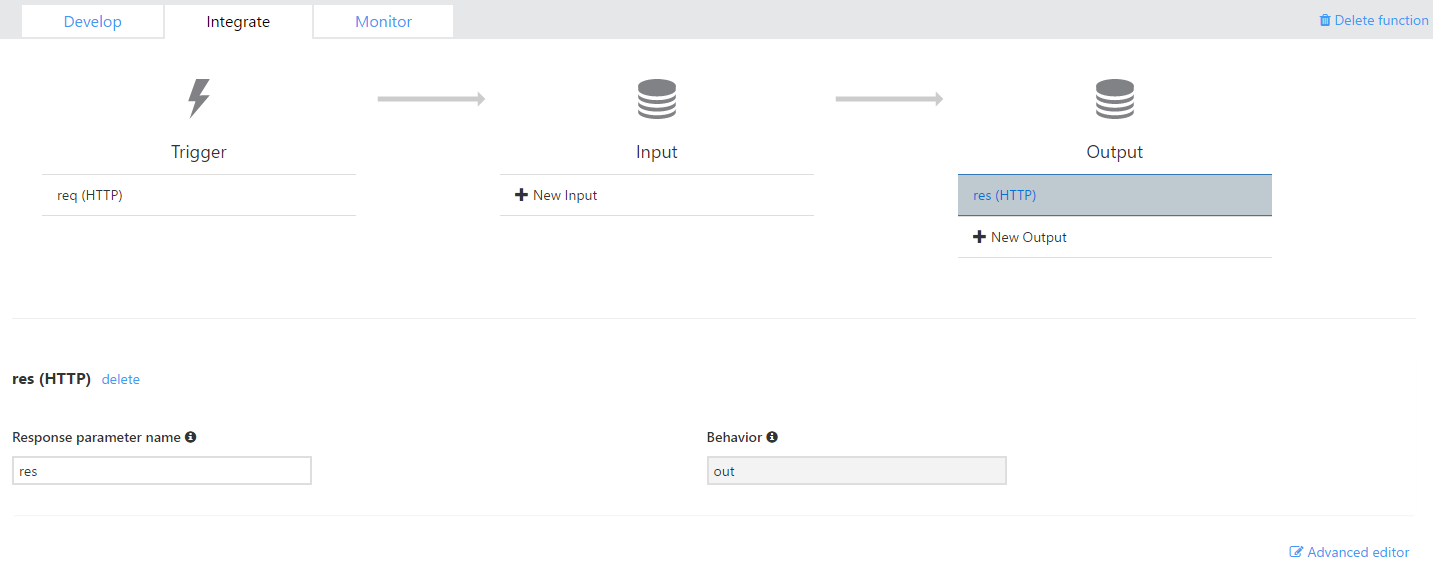
Now you’re setup, go to the Integrate tab and change the Trigger and Output to HTTP (note that the parameter names are req and res now instead of input and output).
Now go back to the script and change input to req and output to res wherever you see them.
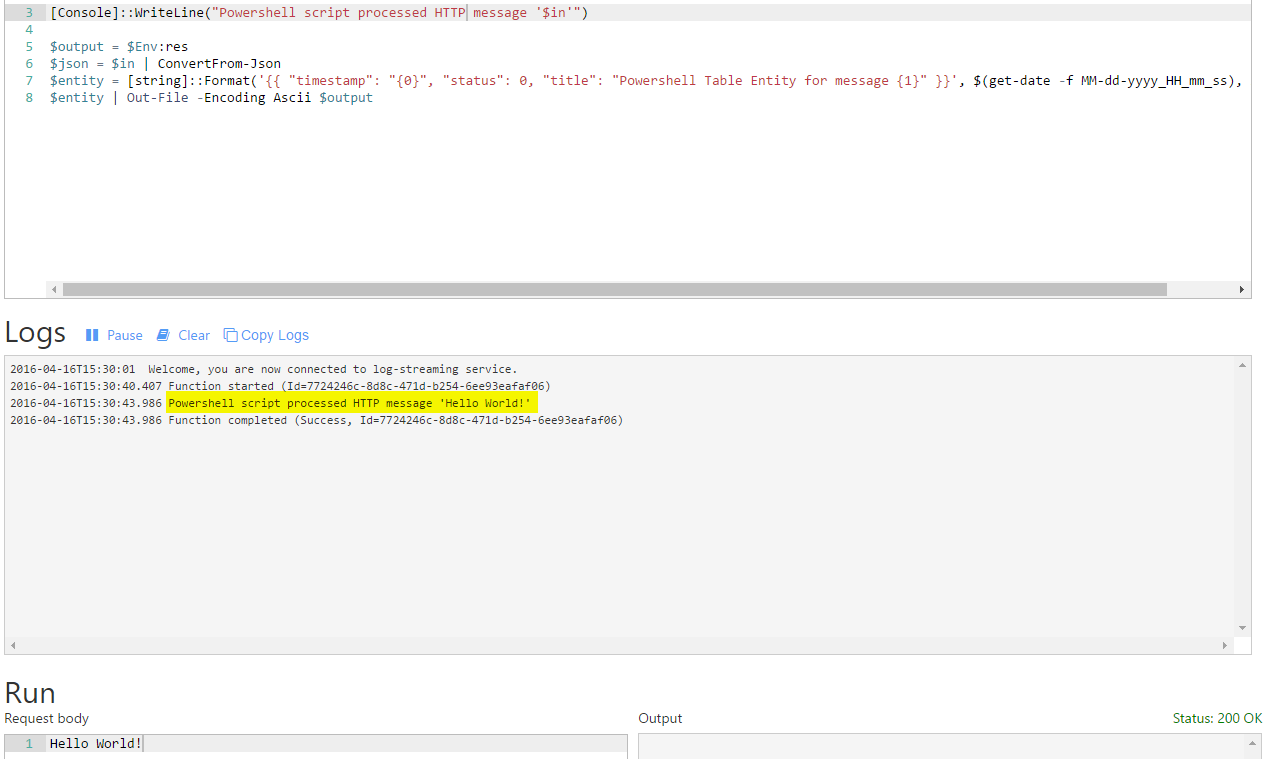
Now change the word “queue” on line three to “HTTP” (‘cos we’re not reading from a queue anymore!), add a string of some description into the test field and click “Save and Run” at the bottom of the page.
Voila! Our writeline is logging our input!! But wait, nothing’s appeared in our output? What gives?
If you look at lines six to eight, you can see our $entity variable which contains our output is expecting to be able to pull an ID property from a JSON formatted input. This doesn’t exist because we’re not listening to a queue anymore!
So let’s change the $entity on line seven to be something a bit simpler like…
$entity = "Hello {0} {1}" -f $json.FirstName, $json.LastName
We also need to fix the JSON conversion on line 6 so it’ll work with JSON on multiple lines!
$json = $in | Out-String | ConvertFrom-Json
Now let’s update our test input to be a JSON string.
{ "FirstName": "Sam", "LastName": "Martin" }
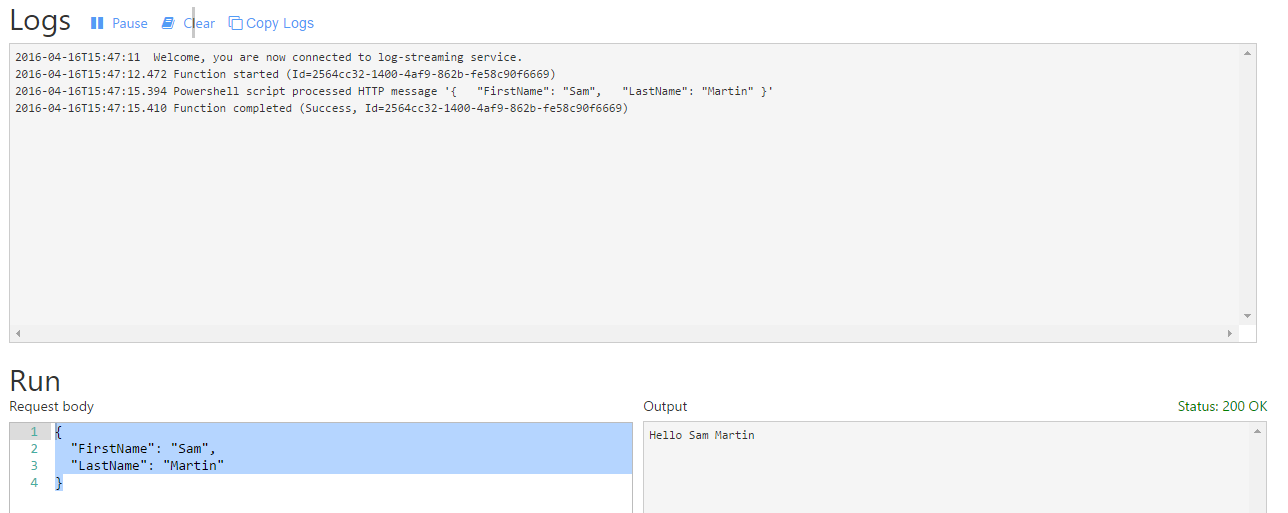
Hit “Save and Run” at the bottom of the screen…
Hurrah! Output and everything!
Our code now looks like this:
$output = $Env:res $json = $in | out-string | ConvertFrom-Json $entity = "Hello {0} {1}" -f $json.FirstName, $json.LastName $entity | Out-File -Encoding Ascii $output
So how do we call this from our laptops? Easy! Grab the Function URL from the top of the page, open a PowerShell Window and execute Invoke-RestMethod like so:
Invoke-RestMethod "<yourfunctionurlhere>" -Method POST -Body '{"FirstName":"Sam","LastName":"Martin"}'
Beautiful! We get our response back into our PowerShell Window!
I’m really excited to see what people end up creating with PowerShell Azure Functions! I can see a whole world of ChatOps rolling out in front of us!


