Getting Started with Chef on Windows Server - Part 2 - Chef Server & Bootstrapping
Now that we’ve done Part 1 – Configure a Package & Service, we can start getting a little more into the meat of Chef: centralisation. In the previous scenario we had defined a single recipe and applied it locally. Very simple, not very useful. In this part, we’re going to create a Chef Server, upload the recipe we created in the previous part to it, and then bootstrap another VM using it.
This is a relatively long winded setup, and if you’re itching to get started I highly recommend running through the LearnChef.com Redhat Enterprise Linux tutorial which even provides you with the VMs and hosted Chef Server, which will get your feet wet and started on the road to Chef. If, however, you’re interested in getting slightly deeper into Chef, step right this way.
Requirements
- Ubuntu Server VM
- IMPORTANT: The 2012 R2 VM you made in the previous part of this series
- Powershell Understanding Basic: Microsoft Virtual Academy Getting Started With PowerShell
- Basic understanding of what Chef is (ideal, but not required).
- Basic Linux knowledge
1) Setting up the Chef Server
“Wait, what? Ubuntu Server? What happened to the “On Windows” part of this? I thought that was the whole point!”
Unfortunately at the time of writing Chef Server is only available on Linux. So in order to manage our Windows servers we’re going to need an Ubuntu Server VM on which we can install Chef Server. Don’t worry, Chef Server isn’t really the focus here, we just need it for configuration centralisation and user management.
There are a couple of alternatives to self-hosting a Chef Server including: Opscode Hosted Chef, and OpsWorks (and probably others). The former looks pretty sexy if you’ve got the cash to splash, and their free trial is crucial in the learnchef.com examples which we’re blatantly ripping off.
- Spin up an Ubuntu Server instance, make sure it has its own IP, can talk to our old 2012 VM, and access to the internet
- Visit http://www.getchef.com/chef/install, ensure you click “Open Source Chef Server 11″ and select the latest version of Chef, copy the URL the link provides you with into notepad.
- In your Ubuntu Server VM enter:
wget [downloadURL]
e.g. wget https://opscode-omnibus-packages.s3.amazonaws.com/ubuntu/12.04/x86_64/chef-server_11.1.3-1_amd64.deb
This will download the chef-server installation file to your current directory.
4. Once that’s complete, execute the installer using: sudo dpkg -i chef-server*.deb
5. Setup Chef Server using the following command (you won’t be asked for any details sudo chef-server-ctl reconfigure
6. Once the configuration is complete, you’re done! You can visit the server in your browsing on https://
2) Log on to the Chef Server and Download Credentials
You will need the following private keys in order to set up the workstation we previously created on our 2012 VM to talk to our new Chef Server.
- An administrative user (in our case, admin)
- A validator user (in our case, chef-validator)
To get these credentials, login to your new Chef Server ([https://
Username: admin
Password: p@ssw0rd1
Note the lowercase p in the password, this is not an MS educational sample!
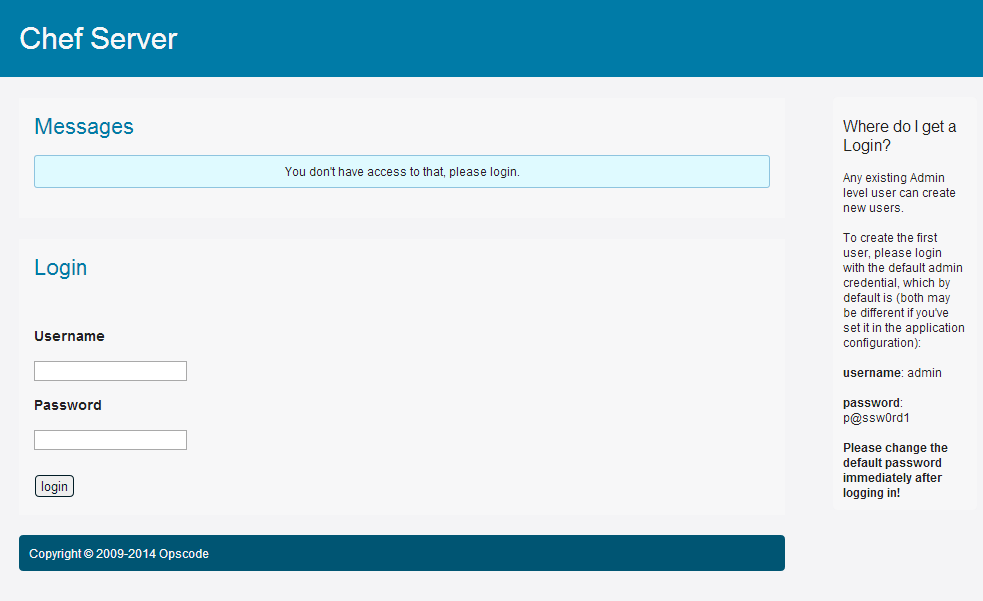
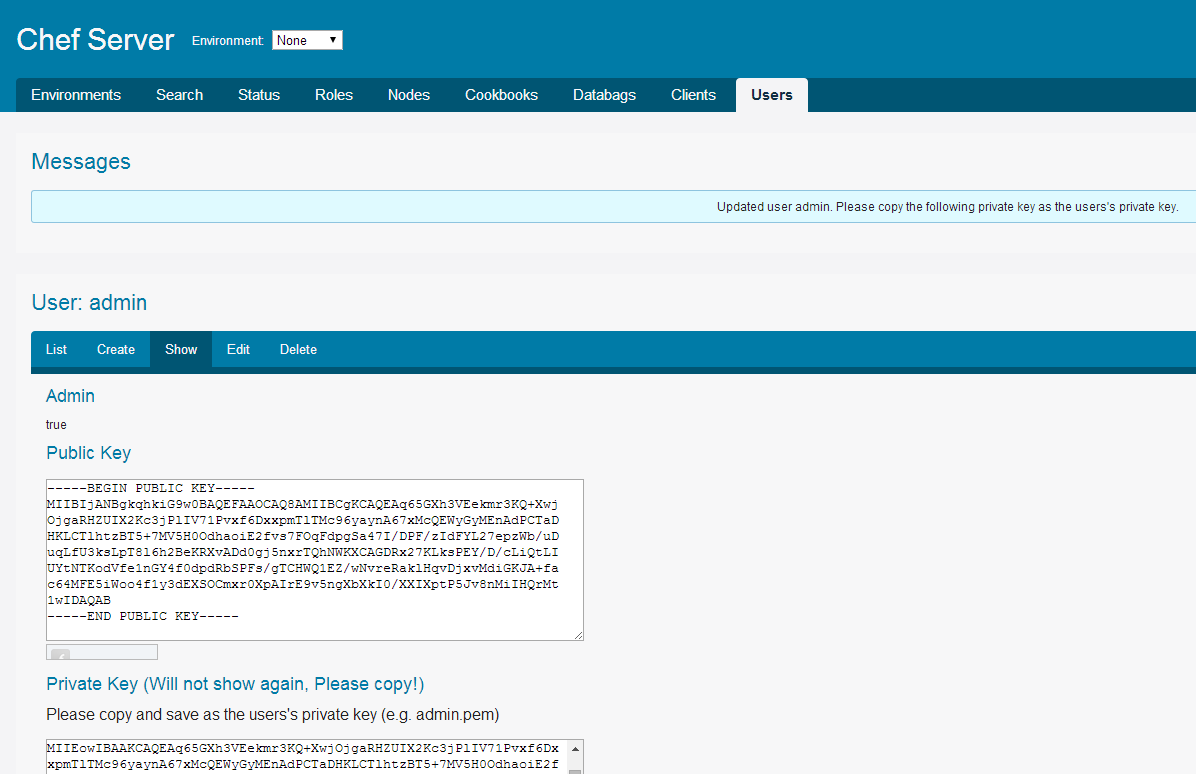
You will be immediately prompted to save the ‘admin’ user’s private key, save this to your desktop as chef-admin.psm.
Now navigate to
Clients > chef-validator > Edit > Regenerate Private Key
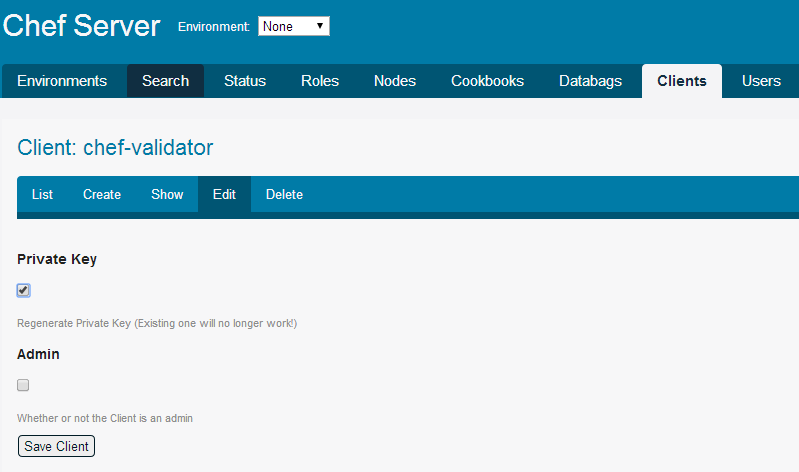
To download the validator’s private key. Save it into a text file called chef-validator.pem on your desktop.
3) Setup the Development Kit in your 2012 VM to Talk to Chef Server
Now we’re going to highlight a distinction that we did not draw in our previous article (mostly because I didn’t really know it existed). That is the difference between a Workstation and a Chef Client.
You’ll remember that we installed both the Development Kit and the Chef Client on to our VM previously, well, as you might imagine, the devkit isn’t something you need on every server, as it is that which we were using to create our recipes and templates. The Development Kit is something you’d (I’d guess) install on a bastion server or RD Gateway allowing you to author your recipes and then upload them to your Chef Server to be deployed elsewhere.
One of the big advantages configuration management is the fact that you can version control your configuration, and to this end we’re going to place our existing recipes into a repository based on the Github Chef repo. Why exactly the repo needs to based on the full Chef repo from OpsCode I’m not sure, but I’m not inclined to contest the official documentation!
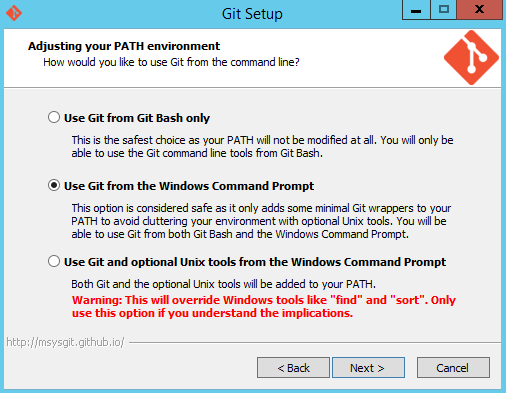
On your 2012 VM from the previous article, download GIT from http://www.git-scm.com/download/win ensuring you tick “Use GIT from the Windows Command Prompt” when asked.
Once installed, open Powershell and CD into your Documents folder and run:
git clone git://github.com/opscode/chef-repo.git

This will pull down the latest copy of the Chef repo from Github and form the basis of our new working directory.
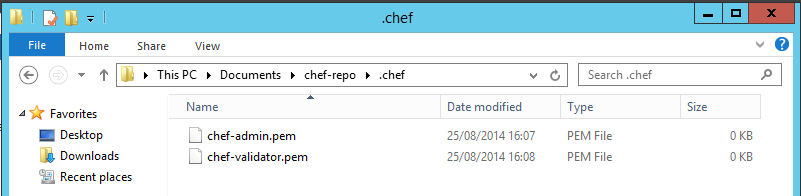
Once complete, create a folder inside the new ‘chef-repo’ folder called .chef (you’ll probably need to use mkdir as the Windows UI won’t let you create a folder starting with a ‘.’) and copy the two pem files you downloaded from the Chef server earlier into it:
Because these files are secret, we don’t want to sync them with our source repo, so open up .gitignore and check that the .chef folder is already ignored.
Important: Because I didn’t have a domain available to me, I lacked the FQDNs required for communication with the Chef Server. To workaround this for my test environment. I simply added an entry to the hostfile on my 2012 VM with the IP of the Chef Server and named it chef-server.fakedomain, which worked fine. (You will also need to do this on the machine you’re bootstrapping later.)
Now we can configure Knife to talk to our new Chef Server by running
knife configure --initial
Which will prompt for the following info:
Location of Config File: <accept default>
Chef Server URL: [https://
Name for New User: w2k12a
Existing Admin Name: admin
Location of Existing Admin’s Private Key: C:\users\<yourname>\documents\chef-repo\.chef\chef-admin.pem
Validation Client Name: chef-validator
Location of Validation Key: C:\users\<yourname>\documents\chef-repo\.chef\chef-validator.pem
Path to Chef Repo: C:\Users\<yourname>\Documents\chef-repo
Password for New User: <your choice>
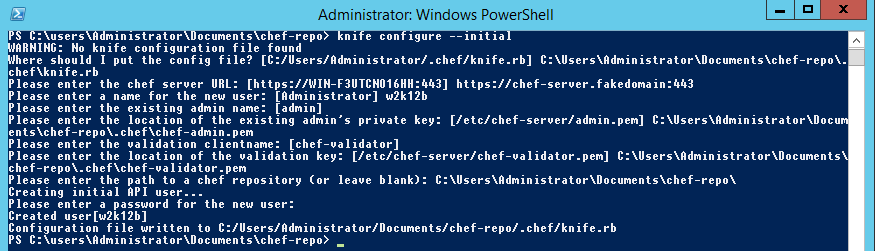
And you’re done! Your workstation is now setup to talk to your Chef Server. Next we need to upload the recipe we created previously and bootstrap an unwitting victim server.
4) Upload Recipe & Bootstrap a New Server
In the previous article we created a basic recipe which installed IIS and amended the default.htm to say “Hello World!”, which is perfect for an illustration of how to take a completely blank server and bootstrap it with a specific recipe.
Upload Recipe to Chef Server
Now that your workstation (old 2012 VM) is setup to talk to our Chef server, we can upload the ‘webserver’ recipe we created locally last time.
Copy the “webserver” directory from* C:\chef\cookbooks* into the repo we just created *C:\users<yourname>\documents\chef-repo\cookbooks* (if the cookbooks subfolder doesn’t exist, create it).
On the same server, run:
knife cookbook upload webserver

Bam, simple as that! Your webserver recipe is now available to any server configured to talk to our Chef server.
Bootstrap a New Server
Go off and spin yourself up a new 2012 server, I’ll wait.
Once you’re done, we’ll need to
- Add your chef server’s FQDN (e.g. chef-server.fakedomain) to the new server’s host file if like me you didn’t have a DNS server to hand.
- Enable Windows Remote Management on the new server
- Install a plugin for Knife on our workstation (the old VM).
Enable Windows Remote Management
On your fresh 2012 server run the following to allow remote access and set the recommended remoting settings from Chef (I neglected the MaxMemoryPerShellMB setting because W2012’s is higher than 300MB already).
Enable-PSRemoting -force Set-Item WSMan:\localhost\MaxTimeoutms 1800000
Set-Item WSMan:\localhost\Service\AllowRemoteAccess $true
Set-Item WSMan:\localhost\Service\Auth\Basic $true
Set-item WSMan:\localhost\Service\AllowUnencrypted $true
Why Enable-PSRemoting and not Set-WSManQuickConfig? Simply because using Invoke-Command from the workstation to the Chef Client is an easy way to troubleshoot connectivity issues.
Important: Do not copy this and use it in your production environment! Use it for testing and PoC and take the time to use proper encrypted auth in your production environment.
On your workstation (old 2012 server) run the following to allow the server to reach out and remote on to the server we’re going to bootstrap.
Set-Item wsman:\localhost\Client\TrustedHosts -value *
Important: Again, don’t copy this straight into production, use a value like *.contoso.com to allow your AD domain’s computers only.
Install Knife-Windows and Bootstrap Server
Hop back onto your old 2012 VM (the one we configured as a workstation with Chef DK) and run the following:
gem install knife-windows
This will call out and download the knife-windows plugin which allows bootstrapping via WinRM instead of the default SSH.
Once that’s done, it’s one simple command (well, kinda) to call out and install Chef Client and execute your Recipe on your new VM!
knife bootstrap windows winrm [new 2012 server ip] -x [windows admin username] -P [password] --node-name node1 --run-list 'recipe[webserver]' -V
(I’ve included -V for verbose because this took nearly ten minutes on my ageing-laptop-powered VMs and wanted some feedback during.)

Some time later…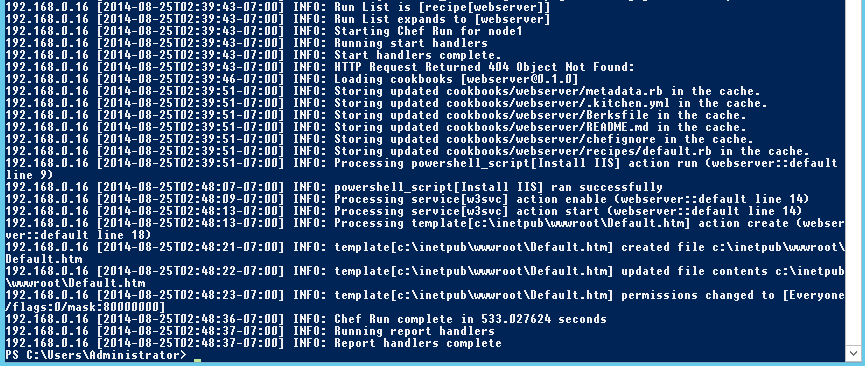
Knife has now reached out to your blank 2012 VM, downloaded the MSI for Chef Client, installed it, and applied your ‘webserver’ recipe, which in turn installed IIS and populated Default.htm.
Did it work? The moment of truth… put [http://ip of your new server](http://<ip%20of your new server>)into your browser
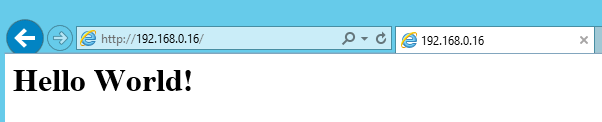
Holy crap it actually worked!
Synopsis
So what have we actually achieved here? We’ve taken a recipe for installing IIS and an extremely basic custom website that was previously only applicable locally, and uploaded it to our own locally hosted Chef Server, allowing us to execute it remotely even when Chef isn’t already installed.
We’ve only scratched the surface of Chef here, and there are loads of questions to ask and answer, e.g.:
- How does Chef benefit from Desired State Configuration?
- How do I define per-server or per-environment settings like connection strings?
- How do I manage databases?
- How do I manage service account credentials?
- How do I deal with my existing executable installers?
- How do I manage upgrades?
And so on ad infinitum. Some of these may be answered in upcoming posts about OneGet and Desired State Configuration, others may be the subject of a further introduction-to-concepts blog post, depending on how well I get on with Chef. All are, I’m sure, answerable with appropriate research though. If you know of any useful conceptual introductions on Chef, please share them in the comments!
Further Reading
Install the Server on a Virtual Machine
How to Install a Chef Server, Workstation, and Client on Ubuntu VPS Instances
Managed Reference for WinRM Windows PowerShell Command Classes