Getting Started with Chef on Windows Server - Part 3a - Packer, Vagrant, and Vagrant Omnibus
Introduction – HashiCorp Atlas
It’s been a fair few months since my last post in this series (or at all for this matter) and I haven’t made anywhere near the progress with Chefifying (definitely a word) my environment as I would like due to new more urgent projects.
Since my last post, HashiCorp has announced Atlas as a tech preview, which (in part) replaces VagrantCloud which I referenced in part 3. HashiCorp are placing Atlas as a solution to a large portion of your DevOps deployment lifecycle.

This is powered by four components:
- Consul (monitoring & service discovery)
- Packer (VM template management)
- Vagrant (Repeatable development environment creation)
- Terraform (Cloud agnostic infrastructure-as-code)
Atlas looks to be the wrapper that ties all these together to make it easy to manage vagrant boxes, terraform deployments, packer images and consul configurations in a single place as a coherent pipeline.
Terraform looks very interesting to me as it’s placed in a CloudStack style space but looks much lighter weight. But currently we’re only interested in Vagrant and by extension Vagrant boxes and Vagrant Cloud.
So what happened to Vagrant Cloud?

Well the good news is that all existing VagrantCloud Boxes and URLs still work, so in theory Part 3 will still work for everyone!
However, for some reason, when you search Atlas for “Windows” the kensykora/windows_2012_r2_standard box we were using no longer shows up!
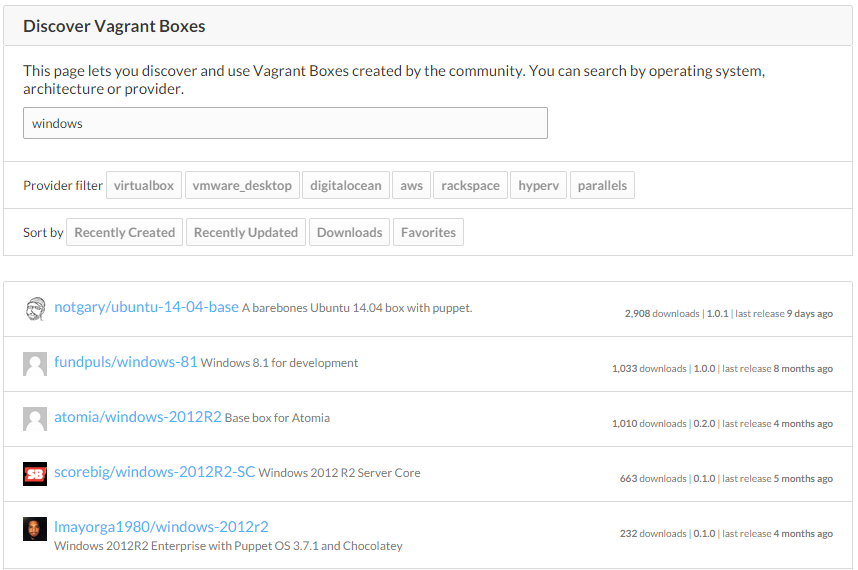
No idea why as it still exists, but anyway this gave me a good excuse to play with Packer!
Rolling your own Windows 2012 R2 Trial Vagrant box with Packer & Joe Fitzgerald
Why? Well, initially I thought kensykora’s Vagrant box had disappeared which was what caused me to look into this in the first place, but there are a few additional reasons:
- kensykora’s box took a very long time to download (I imagine because the chap was dutifully hosting it on his own hardware in which case power to him and we shouldn’t complain about conveniences we get for free!)
- Packer allows you to roll your own boxes from the Windows Trial ISOs, meaning you’re not dependent on other people keeping their boxes up-to-date with fresh trials
- Packer is a useful tool in its own right. It allows you to create your own golden images (even if they’re just Windows with the latest updates installed) and deploy them pretty much anywhere, AWS, VMWare, VirtualBox, Azure, you name it.
Like pretty much every tool in this space it has its origins in in the nix world, but fortunately all the hard work of creating Windows packages has been done for us already by Joe Fitzgerald in his freaking awesome Windows Packer GitHub repo.
There’s a lot of stuff going on with Packer, but we’re not trying to explore Packer in depth just yet. All we’re trying to do is roll a Windows 2012 R2 trial Vagrant box with the minimum amount of fuss.
You will need
- VirtualBox
- Vagrant
- Some knowledge of the above two (the previous two parts of this blog series would be helpful! :))
Step 1) Install Packer
Well… I say install, more like extract and add to your path environment variable.
Download the windows version from https://packer.io/downloads.html and extract it anywhere you like, and add that path to your PATH environment variable like so:
[Environment]::SetEnvironmentVariable(“path”, “$($env:path);C:\Users\smartin\Documents\packer”, “machine”)
Where “C:\Users\smartin\Documents\packer” is the path you extracted packer to.
You could of course set it using the GUI like a normal person if you prefer!
Step 2) Download and extract Joe’s Packer-Windows repo
Go to https://github.com/joefitzgerald/packer-windows and hit the “Download Zip” button.

Then extract the Zip to wherever you like (though preferably on a hard disk with some space as this directory will be where the ISO is downloaded to AND where the resultant box file is created).
Step 3) Disable Windows Updates, Enable Head, and Build
Okay you don’t *have * to disable Windows updates, in fact, if you’re building a golden image for a production environment you absolutely should not do this step. However, if you’re just trying to get a 2012 R2 Vagrant box built as fast as possible (i.e. in less than an hour!) then follow Joe’s steps to disable Windows Updates, which are:
Open the directory to which you extracted packer-windows-master.

Find answer_files2012_r2Autounattend.xml and uncomment the section that starts “WITHOUT WINDOWS UPDATES” and comment out the section that says “WITH WINDOWS UPDATES”. It should look like the following screenshot once you’re done:

This will cut out a lot of time for the packer build!
Next, open up packer-windows-masterwindows\_2012\_r2.json and change the virtualbox-iso headless value to false. This isn’t strictly necessary, but helps you see what’s going on and appreciate how awesome it is that you don’t have to do all this by hand!
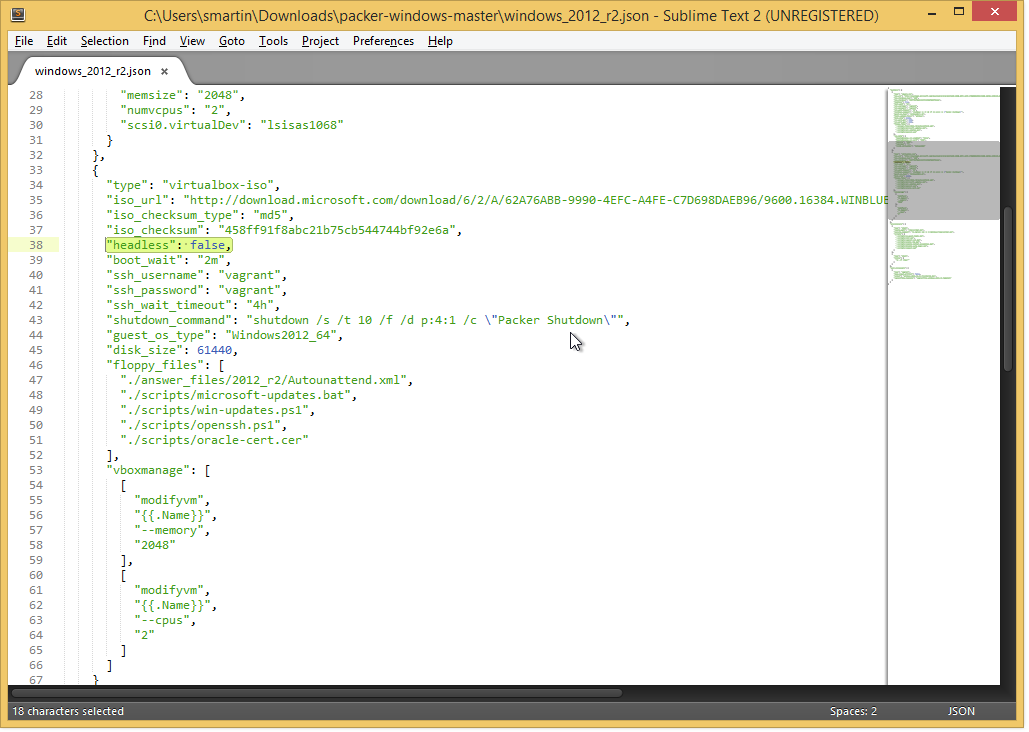
Save, that, open a PowerShell window and CD to your packer-windows-master directory and run:
packer validate windows_2012_r2.json
then once that returns successfully
packer build windows_2012_r2.json
This will take a while to run as it does the following:
- Downloads the Windows 2012 R2 Trial ISO
- Installs Windows 2012 R2 Trial to a temporary VirtualBox VM
- Packages that VM up into a Vagrant box and dumps it into your *packer-windows-master *directory

snore
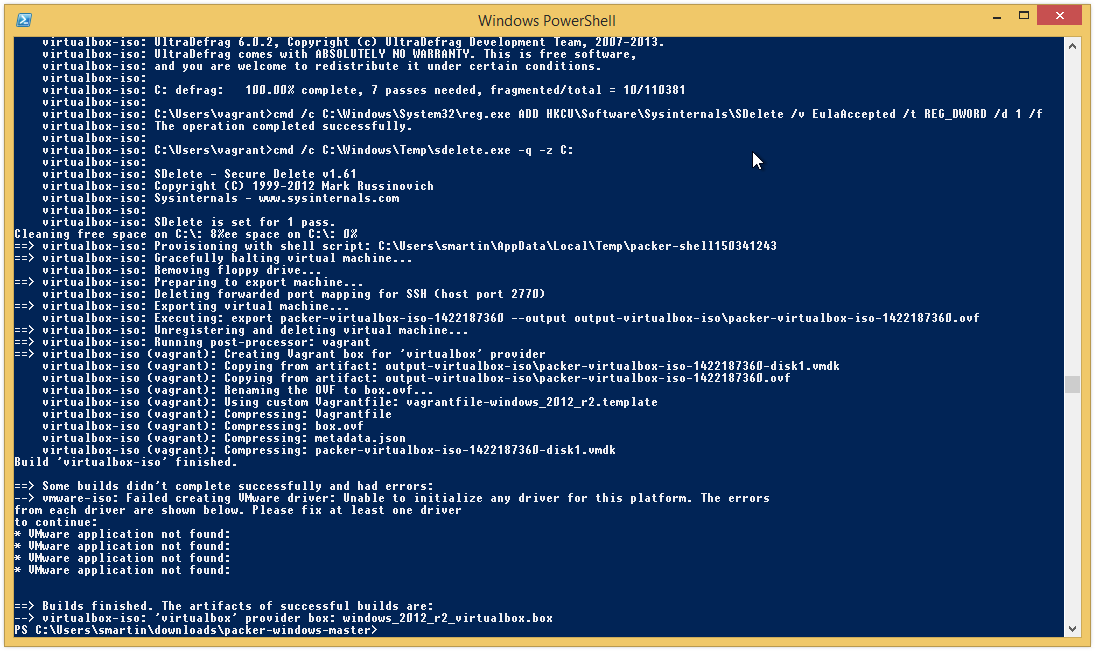
This will throw errors about VMwareapplication not existing, but that’s fine, we don’t want a VMware template.
Finished? Then let’s proceed to register it.
Step 4) Register the box with Vagrant
Now, you’ve not had to do this in any of the previous guides because we always used Vagrant Cloud for our Vagrant boxes. But this time we need to tell Vagrant about the new box we’ve just created!
vagrant box add C:\Users\smartin\Downloads\packer-windows-masterwindows_2012_r2_virtualbox.box --name "smartin-2012r2"

The name is completely arbitrary, do change it for your purposes, and the location obviously has to be amended to reflect where your packer-windows-master directory is!
Step 5) Install Vagrant Omnibus and Create a Vagrant Project
Vagrant Omnibus is a Vagrant Plugin that ensures Chef is installed on your Vagrant box as part of the provisioning process (much neater than my messy PowerShell script in Part 3).
vagrant plugin install vagrant-omnibus

With that done you can create a new folder (wherever you like) for your vagrant project. Mine’s called vagrant-base-2012R2 but it really doesn’t matter.
In that new folder, create a file named VagrantFile (no extension) and paste the following into it:
# -*- mode: ruby -*-
# vi: set ft=ruby :

# Vagrantfile API/syntax version. Don't touch unless you know what you're doing!
VAGRANTFILE_API_VERSION = '2'

Vagrant.configure(VAGRANTFILE_API_VERSION) do |config|
  # All Vagrant configuration is done here. The most common configuration
  # options are documented and commented below. For a complete reference,
  # please see the online documentation at vagrantup.com.

  config.vm.provider 'virtualbox' do |v|
    v.gui = true
    v.memory = 1024
    v.cpus = 1
  end
  # Every Vagrant virtual environment requires a box to build off of.
  config.vm.box = 'smartin-2012r2'

  # Install the latest chef
  config.omnibus.chef_version = :latest
end
Most of this should be familiar from previous parts, but the important bit to change is the name in config.vm.box as this must match whatever name you passed as part of vagrant box add.
Once that’s created, VAGRANT UP!

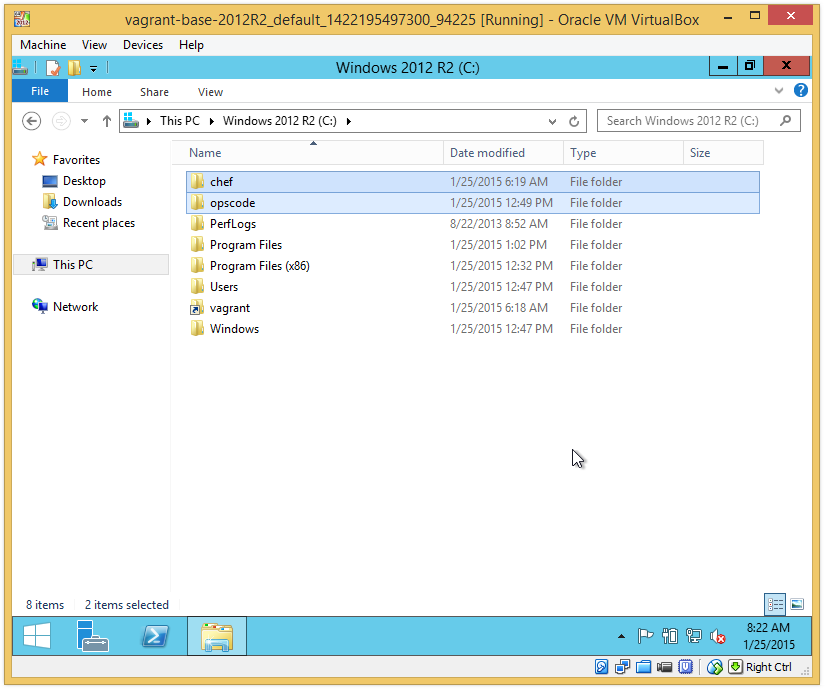 Et Voila! One repeatable build from ISO > Vagrant Box with Chef installed!